A well-lit home exterior does more than look good from the street, it deters intruders, prevents trips on dark walkways, and adds real value to your property. But the difference between lighting that works and lighting that creates glare, hot spots, or dead zones comes down to one thing: where you put the fixtures. That’s exactly what this outdoor lighting placement guide covers.
We’ll walk through specific mounting heights for wall-mounted lights, recommended spacing for path fixtures, and placement strategies for accent and security lighting. You’ll get actual numbers, not vague advice, so you can plan a layout that balances safety, function, and curb appeal. Whether you’re lighting a front walkway in Scottsdale or a backyard patio in Chandler, the principles stay the same.
At AZ DC Electric, we install outdoor lighting systems across the Greater Phoenix Metro Area every week. We’ve seen firsthand what happens when fixtures are mounted too high, spaced too far apart, or aimed in the wrong direction. This guide pulls from that hands-on experience so you can either tackle your project with confidence or know exactly what to ask for when you call in a licensed electrician.
How outdoor lighting placement works
Outdoor lighting operates on the same basic principle as indoor lighting: light output drops off sharply as distance from the source increases. That means a fixture mounted too high or placed too far from the surface it’s meant to illuminate will leave you with dim, uneven coverage. Understanding how light behaves before you install anything saves you from having to relocate fixtures after the fact.
The single biggest placement mistake homeowners make is mounting fixtures too high, which spreads light too thin and creates glare without providing real illumination at ground level.
The three lighting layers
Professional outdoor lighting design uses three distinct layers: ambient, task, and accent. Ambient light provides general illumination across a broad area, like a porch light or post lantern. Task lighting focuses on specific functional zones such as entry steps, a driveway, or a grill station. Accent lighting highlights architectural features, plants, or landscape elements for visual interest. Each layer requires different fixture types and different placement logic.
Most residential properties need all three layers working together. A front yard with only a single porch light has ambient coverage near the door but leaves the walkway and landscaping in darkness. Layering task and accent fixtures into that space fills the gaps without creating harsh bright spots.
How beam angle and mounting height affect spacing
Every outdoor fixture has a beam angle, which is the spread of light it throws. A narrow-beam spotlight (15 to 30 degrees) concentrates light on a tight area, making it useful for uplighting a tree or a column. A wide-beam fixture (60 degrees or more) covers more ground but delivers lower light intensity across that area. The mounting height multiplies this effect: double the height, and you roughly double the coverage diameter while cutting intensity by about 75 percent.
For path lights and step lights, you want adjacent pools of light to overlap slightly rather than leaving gaps between them. A fixture mounted 18 inches high with a 60-degree beam covers roughly a 3-foot diameter circle at ground level. Spacing those fixtures 6 to 8 feet apart gives you the overlap you need for safe, even illumination along a walkway. This is the core logic behind every measurement in this outdoor lighting placement guide.
Step 1. Map your lighting zones and priorities
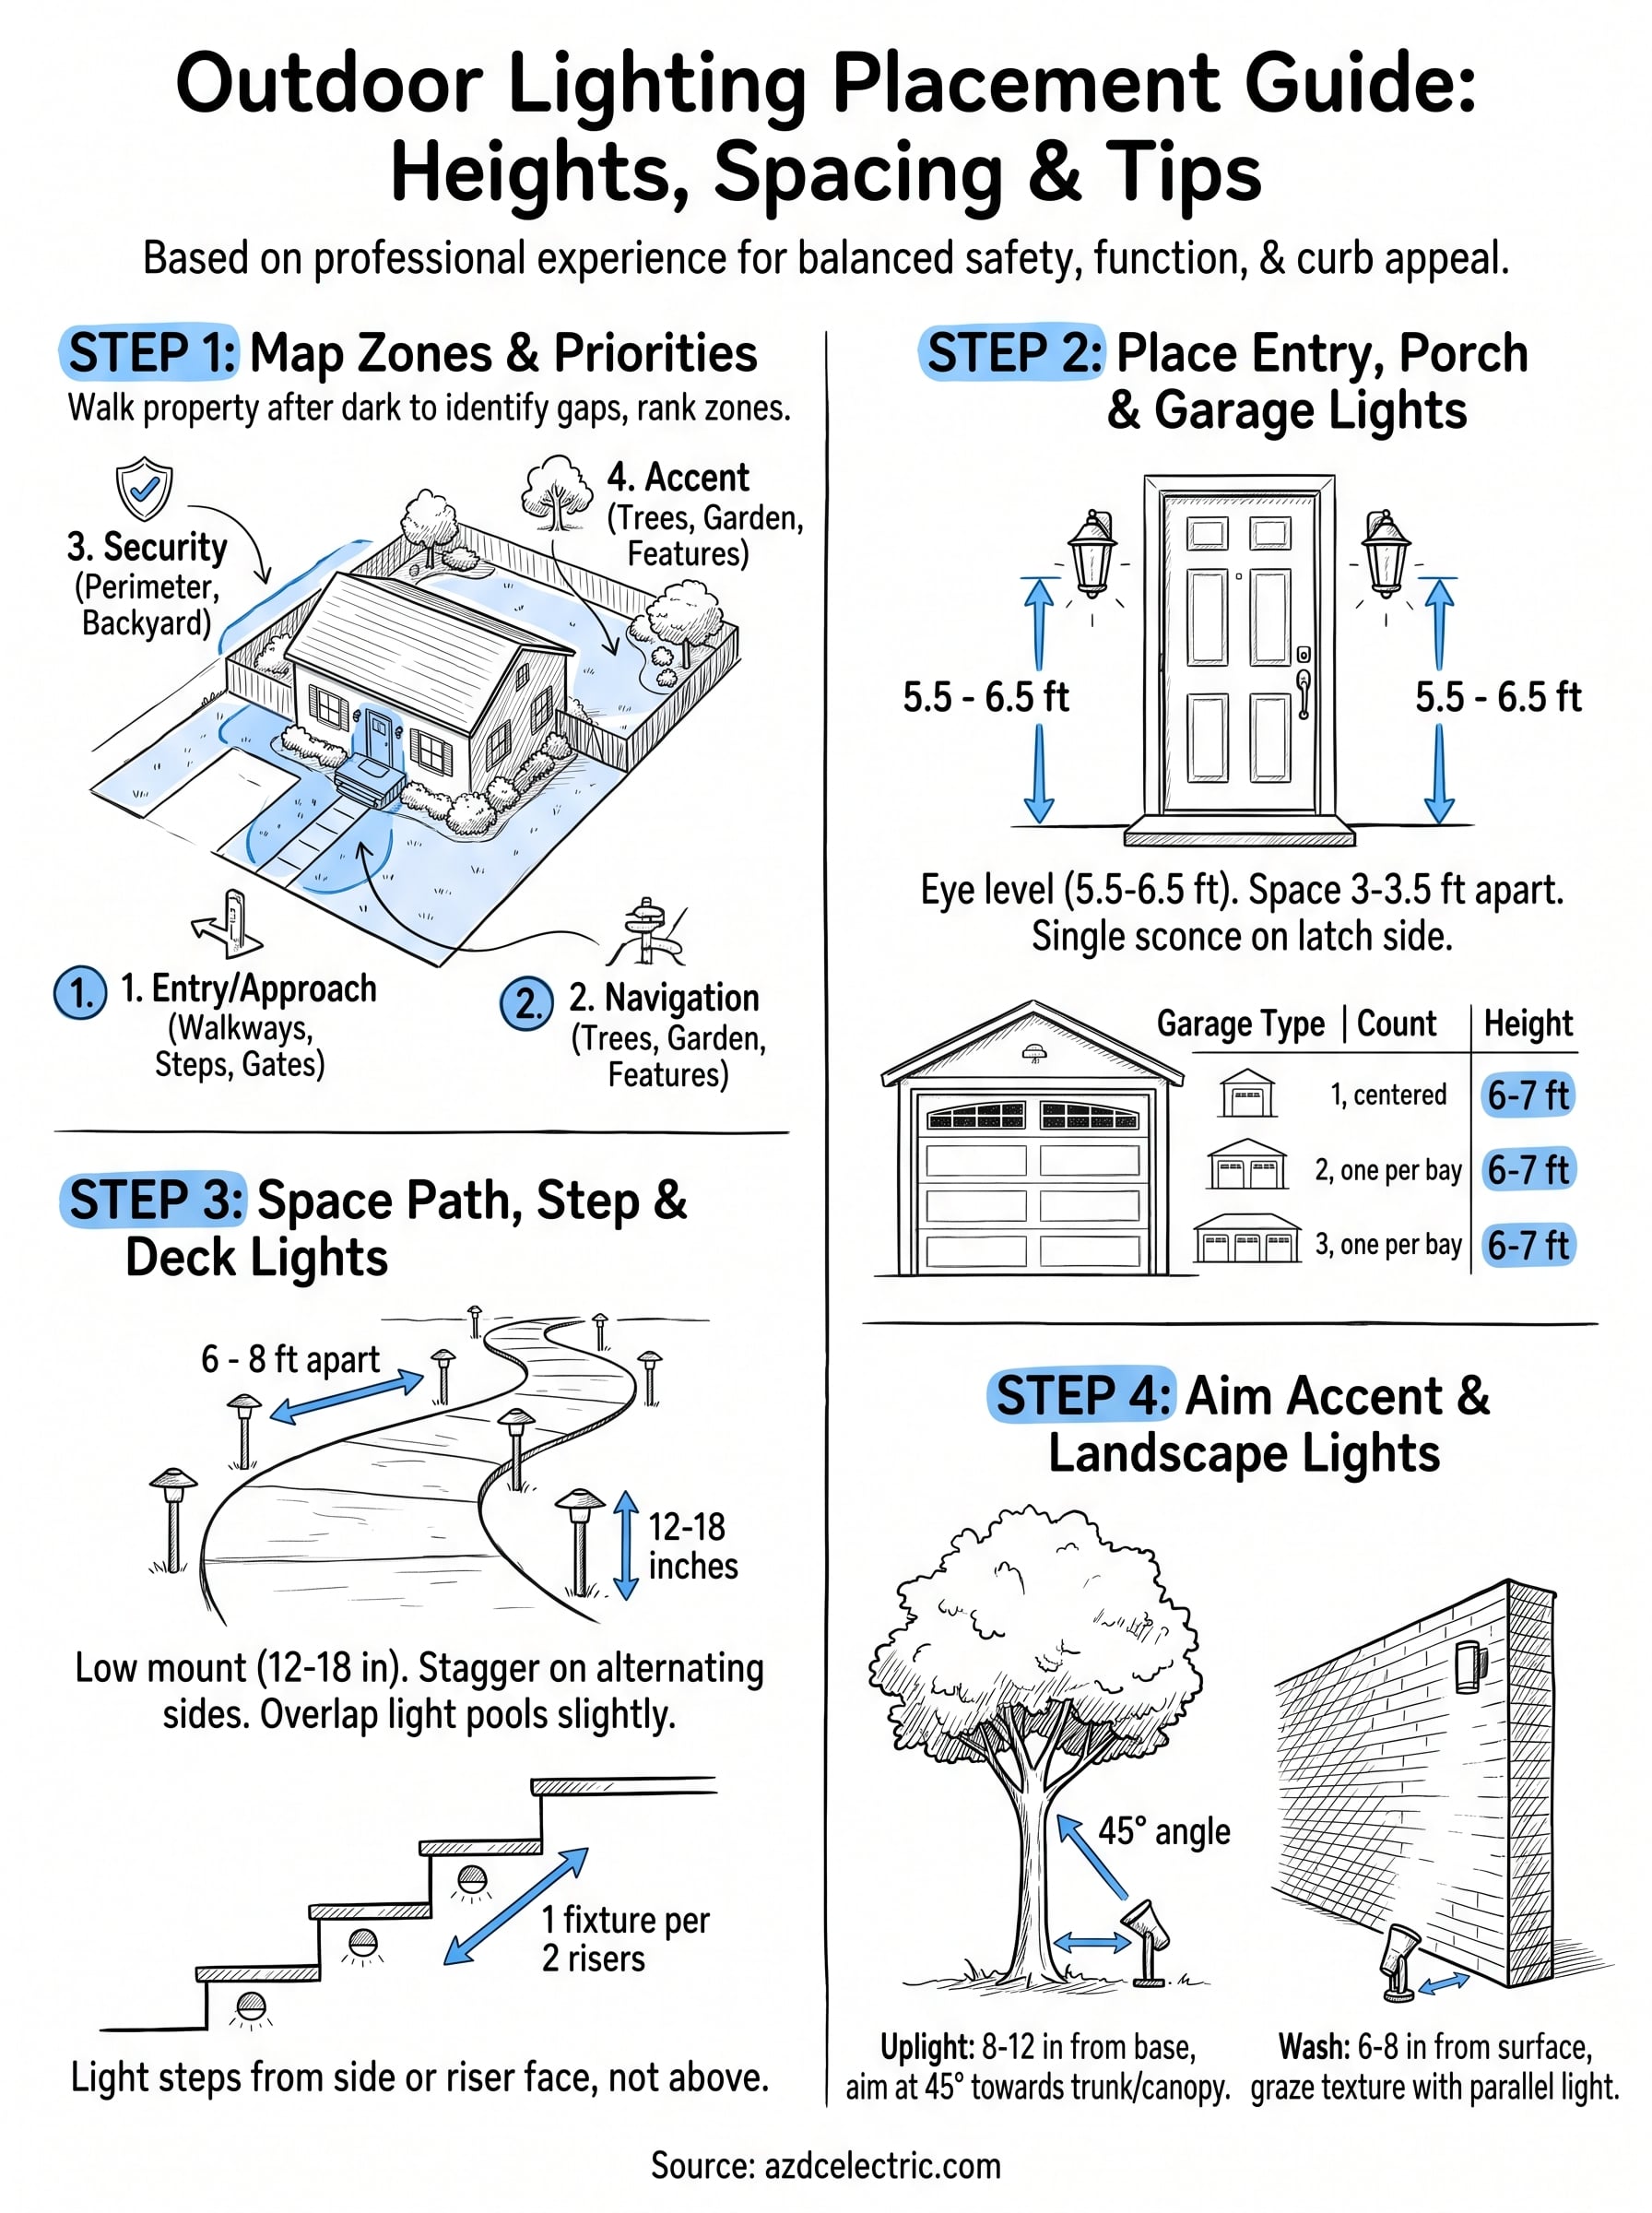
Before you buy a single fixture, walk your property after dark with a flashlight and note every area where you stumble, can’t see clearly, or feel unsafe. This walkthrough reveals your actual lighting gaps rather than what you imagine from inside the house. Bring a notepad or use your phone to sketch a rough outline of your lot as you go.
Identify your zones
Divide your property into functional zones: entry and approach (front door, porch, driveway), navigation (walkways, steps, side gates), security (perimeter, backyard), and accent areas (trees, garden beds, architectural features). Each zone serves a different purpose, which means it needs a different fixture type and a different placement strategy.
Prioritize safety zones first. A dark step or unlit driveway causes real harm; a poorly lit garden bed just looks flat.
Build a simple zone map
Sketch your property on paper or pull up your address in Google Maps to outline your lot. Mark each zone with a letter (E for entry, N for navigation, S for security, A for accent) and rank them by priority from 1 to 4. This map becomes your shopping and installation checklist for every remaining step in this outdoor lighting placement guide.
| Zone | Purpose | Priority |
|---|---|---|
| Entry/approach | Safe access to the front door | 1 |
| Navigation | Lit paths, steps, and gates | 2 |
| Security | Perimeter and backyard coverage | 3 |
| Accent | Visual interest and curb appeal | 4 |
Step 2. Place entry, porch, and garage lights
Entry and porch lights are the first fixtures visitors notice, so placement here directly affects both safety and curb appeal. Mount wall sconces at eye level, between 5.5 and 6.5 feet from the finished floor to the center of the fixture. Going higher than 6.5 feet pushes the light source above the coverage zone you actually need at ground level.
Mount porch and entry sconces at the right height
Flanking your front door with two sconces, one on each side, spaced 3 to 3.5 feet apart gives you even light without shadows across the entry. If you install only one sconce, place it on the latch side of the door at 5.5 to 6 feet high. For a covered porch, add a ceiling-mounted fixture centered over the main traffic area in addition to wall sconces.
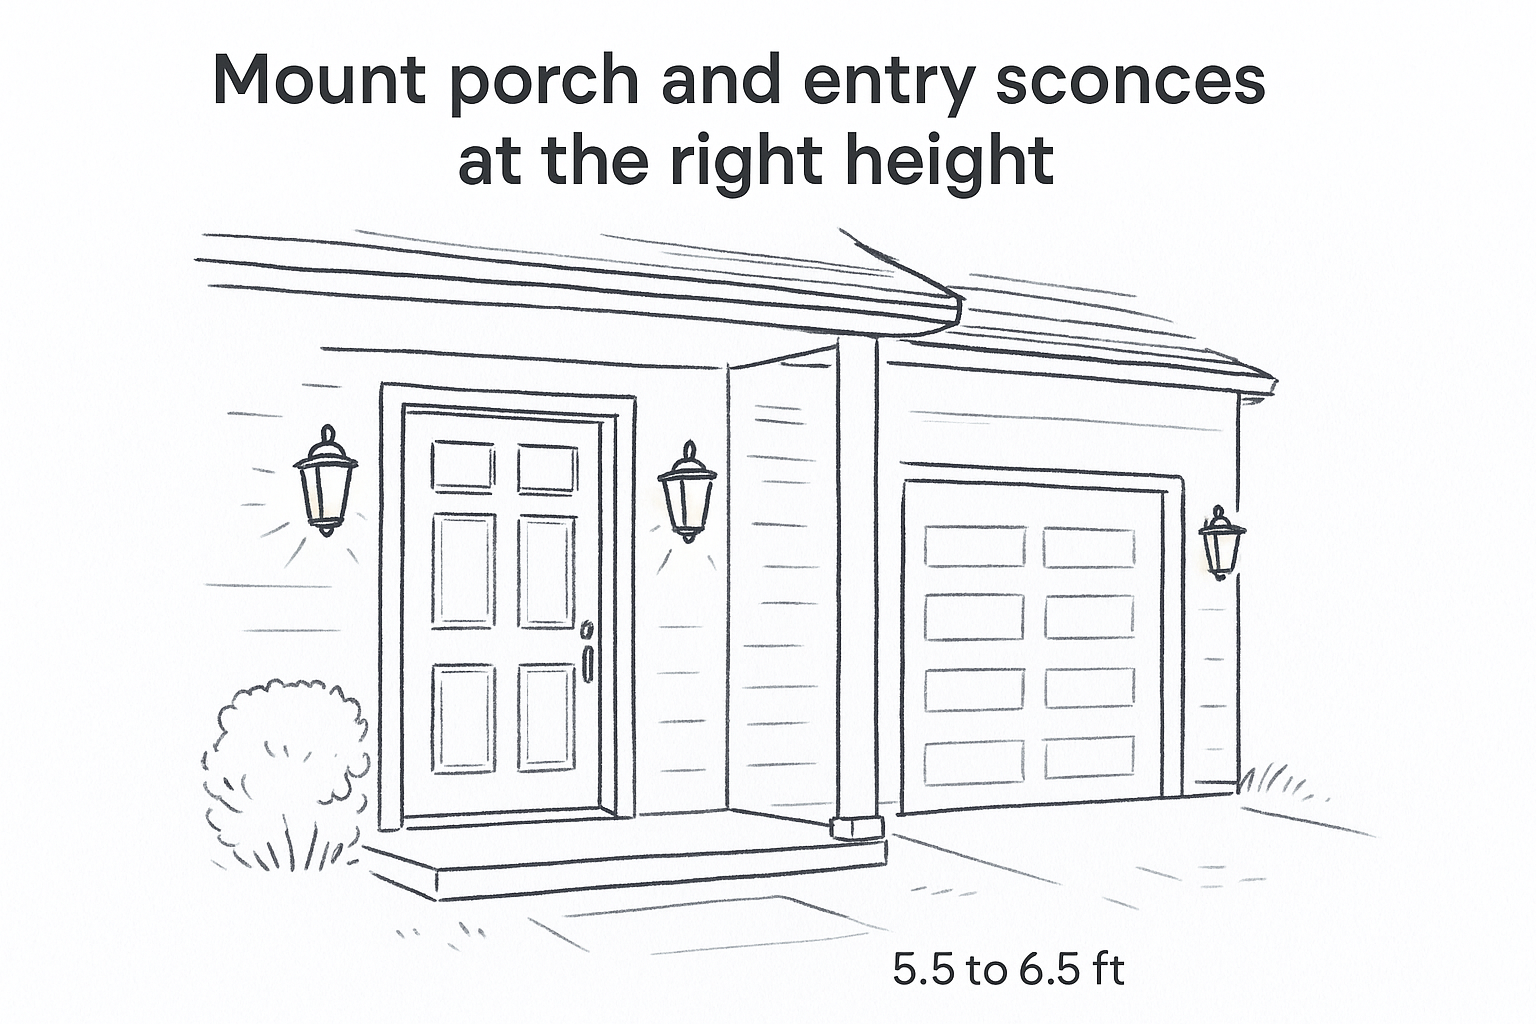
A fixture mounted above 7 feet at a front entry creates glare for anyone approaching from the street, and delivers weaker light at step level where you need it most.
Position garage lights to cover the driveway apron
Garage lights serve double duty: they illuminate the overhead door surface and cast light onto the driveway directly in front. Use this reference table to match your garage configuration to the right fixture count and mounting height for this section of your outdoor lighting placement guide:
| Garage type | Fixture count | Mounting height |
|---|---|---|
| Single bay (9 ft wide) | 1, centered above door | 6 to 7 ft |
| Double bay (18 ft wide) | 2, one per bay | 6 to 7 ft |
| Triple bay (27 ft wide) | 3, one per bay | 6 to 7 ft |
Step 3. Space path, step, and deck lights
Path, step, and deck fixtures handle the navigation zone you identified in Step 1. Getting the spacing right keeps every transition point safe after dark. Unlike porch lights that broadcast light broadly from one fixed point, these fixtures work as a linked system where each unit hands coverage to the next. Gaps between fixtures are where people trip, so consistent spacing matters more here than anywhere else in this outdoor lighting placement guide.
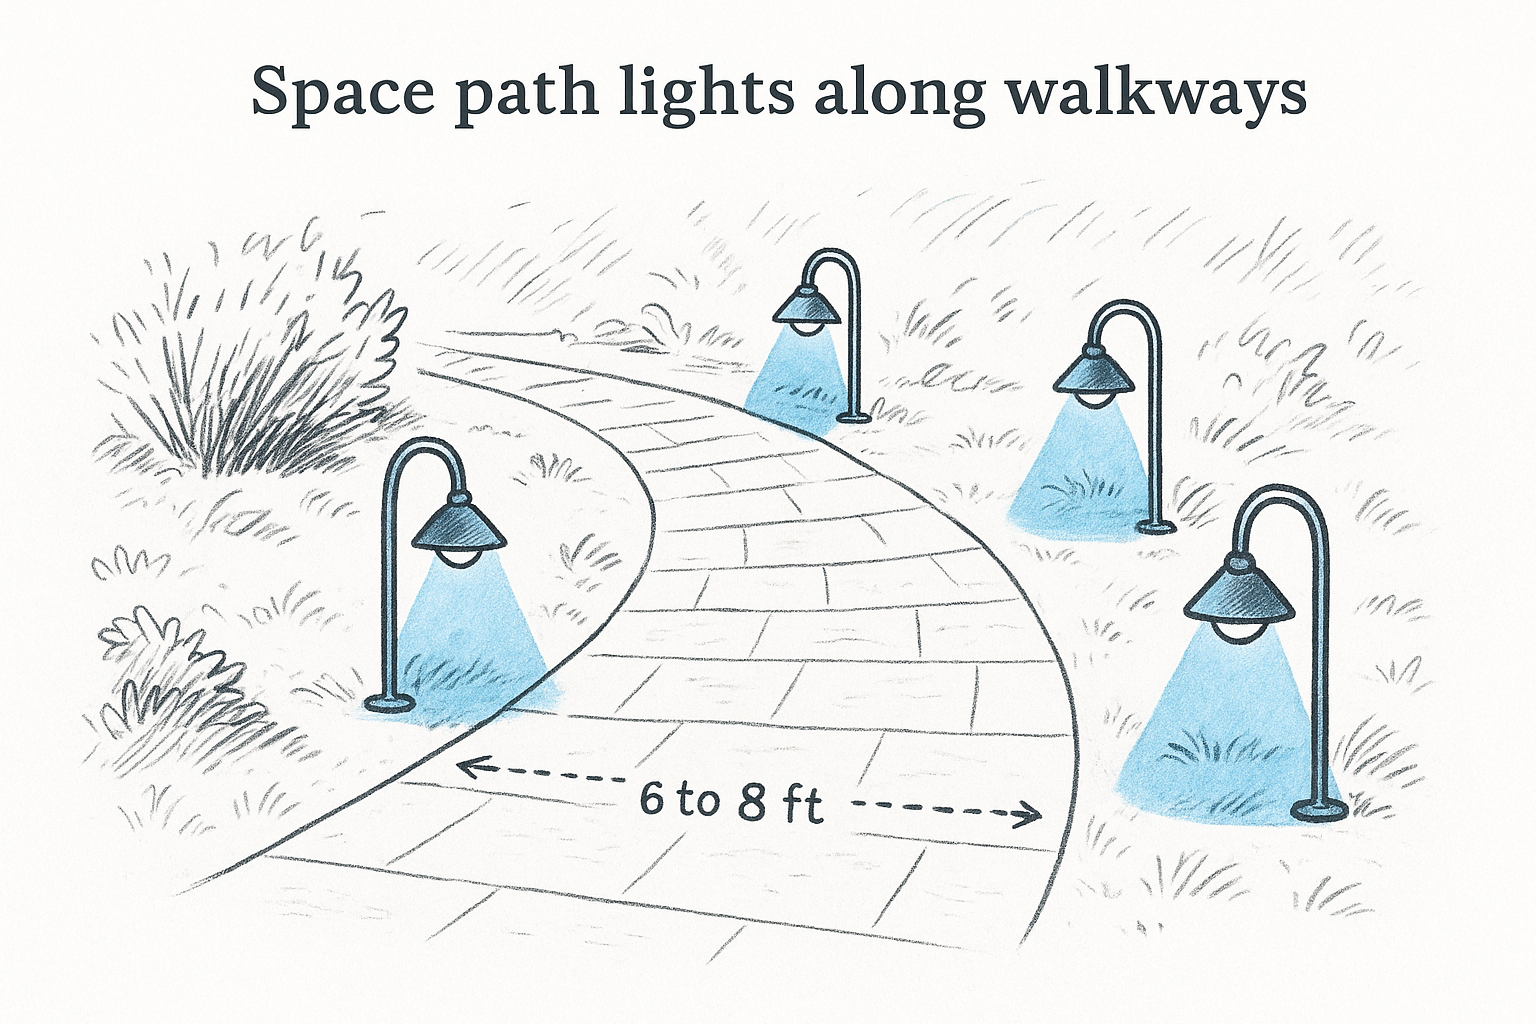
Space path lights along walkways
Low-mounted path fixtures typically sit between 12 and 18 inches above grade. At that height, a standard fixture with a 60-degree beam covers roughly a 3-foot circle at ground level. Space your fixtures 6 to 8 feet apart on alternating sides of the path to create overlapping pools of light without a runway effect running down the center.
| Path width | Fixture placement | Spacing |
|---|---|---|
| Under 3 ft | Single side, alternating | 6 ft apart |
| 3 to 5 ft | Alternating sides | 6 to 8 ft apart |
| Over 5 ft | Both sides, staggered | 8 ft apart |
Stagger fixtures on opposite sides of the path rather than placing them directly across from each other; doing so prevents a tunnel-light effect and pushes coverage farther across the ground.
Light steps and deck edges
Steps need one fixture per two risers at minimum. Mount them to the side wall or riser face rather than above the step so light lands directly on the tread where your foot lands. Recessed lights installed into the riser face itself keep the beam low and pointed at foot traffic. For deck perimeters, space post-cap or rail lights every 6 feet to maintain continuous coverage along the edge without dark gaps between posts.
Step 4. Aim accent and landscape lights
Accent lighting is where this outdoor lighting placement guide transitions from function to visual design. The goal isn’t to flood a space with brightness but to direct attention toward specific features: a mature tree, a stone column, or a textured garden wall. Getting the aim right requires thinking about the angle of the beam, the distance from the fixture to the target, and the color temperature of the bulb (2700K to 3000K works well for warm, natural-looking landscapes in the Phoenix climate).
Uplight trees and architectural features
Place uplights 8 to 12 inches from the base of a tree or column, angling the fixture at 45 degrees toward the feature. For a tree with a spread wider than 15 feet, use two fixtures aimed from opposite sides to eliminate flat, one-sided shadows. Keep the beam aimed at the upper two-thirds of the trunk or the canopy rather than the base so the light draws the eye upward rather than pooling at the ground.
Aiming a fixture straight up from directly under a tree trunk wastes most of the light output on bark instead of the canopy, and creates harsh downward shadows on anything below.
Wash garden beds and textured walls
Grazing light across a textured stone or stucco wall requires you to mount the fixture 6 to 8 inches away from the surface and angle it nearly parallel to the face. This technique pulls out the texture instead of flattening it with direct frontal light. For garden beds up to 4 feet deep, a single low-voltage fixture placed at the front edge and angled back at 30 degrees covers the full depth without overexposing the plants closest to the source.
Next steps to finish your plan
You now have a complete outdoor lighting placement guide to work from, covering mounting heights, spacing distances, and aiming techniques for every zone on your property. Take the zone map you built in Step 1 and match each zone to the specific measurements from Steps 2 through 4. That gives you a fixture list, a placement sketch, and real numbers to bring to a hardware store or an electrician.
Most homeowners find that the planning goes smoothly but the wiring stops them. Running low-voltage wire for path lights is a manageable DIY project, but connecting fixtures to your home’s electrical system, adding circuits, or installing GFCI outlets outdoors requires a licensed electrician. Doing that work incorrectly creates real shock and fire hazards.
If you’re ready to move from plan to installation, contact the outdoor lighting team at AZ DC Electric to get upfront pricing and a same-week appointment across the Greater Phoenix Metro Area.